As all my previous attempts only lead to one sample per 5milliseconds on average, I started to try the library and example from fat16lib, you can find this library here: New fast data logging sketches
My first measurements showed a sampling rate of about 62,5k samples per second (one sample every 16µs). This is a factor 375 better than before, but so far I only wrote the voltage measurement and micros()%256 as timestamp. In my previous tests I wrote micros(), voltage, pulse width and current to the SD, which was around a factor 8 of data. First guess: with the new approach I could achieve an improvement by a factor of 46 – further ADC and digital PIN reading not yet considered.
Next I changed to full ADC 16Bit logging..errr…10 Bit on a 328p 😉
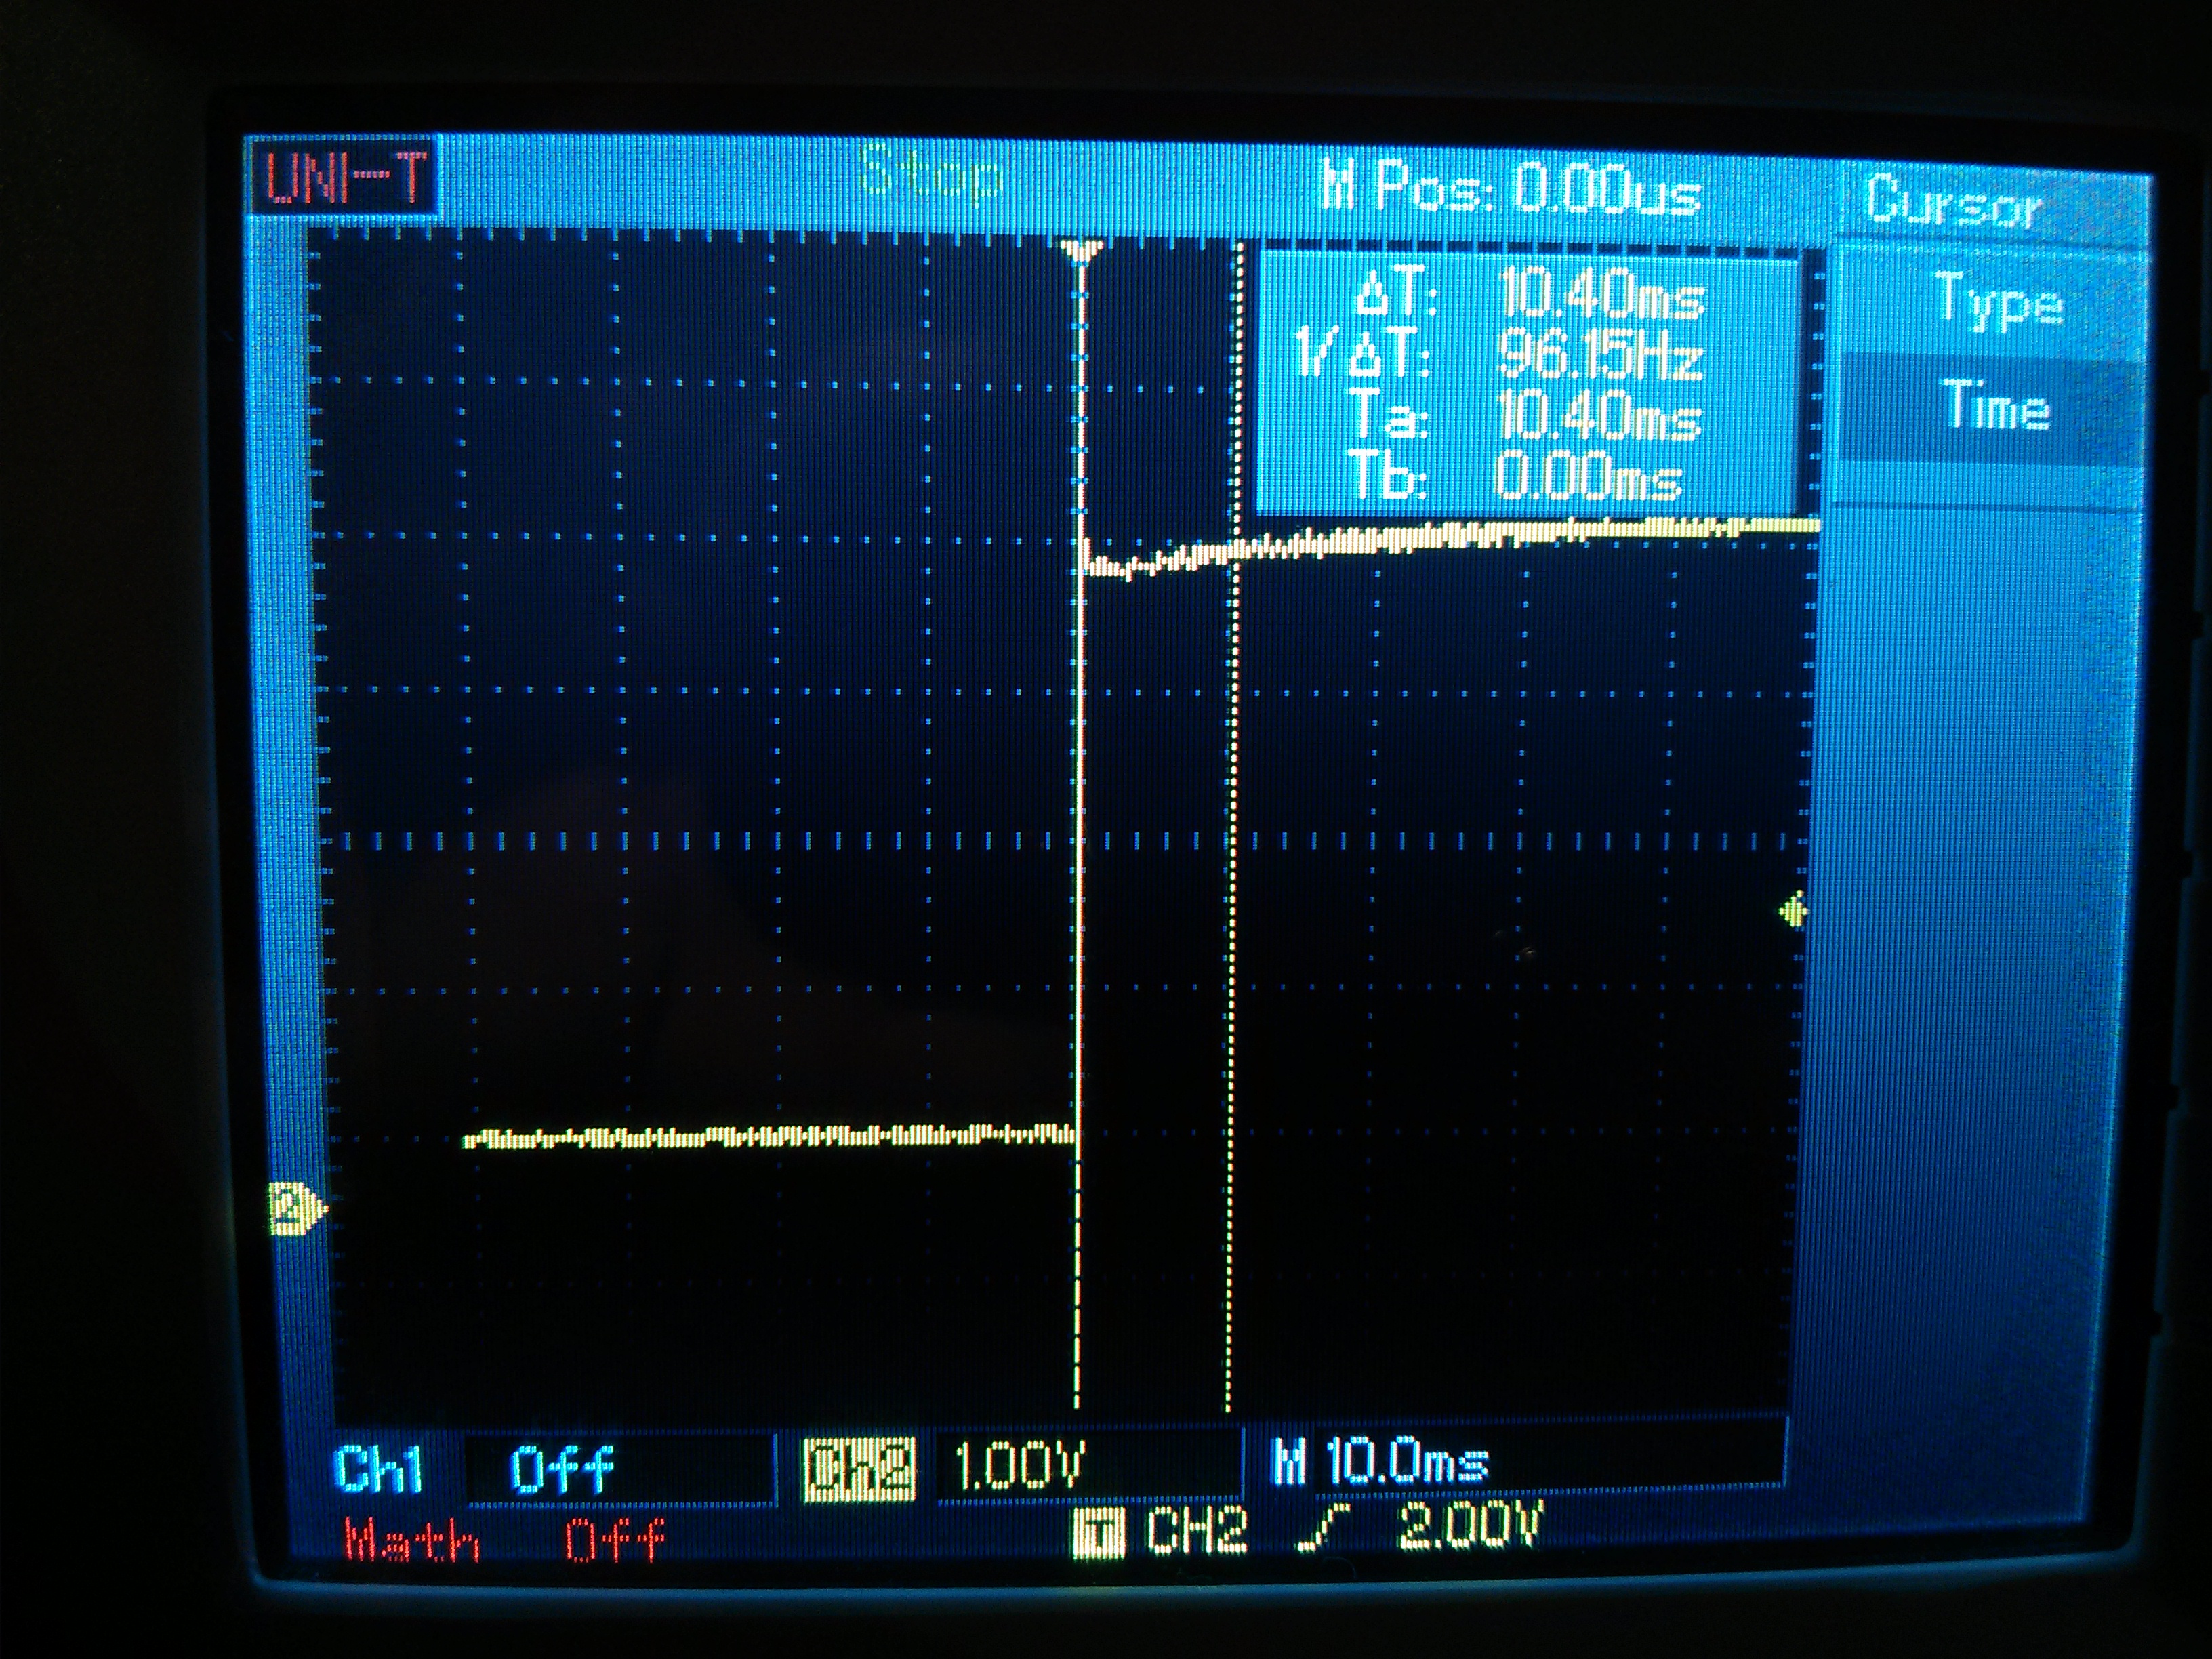
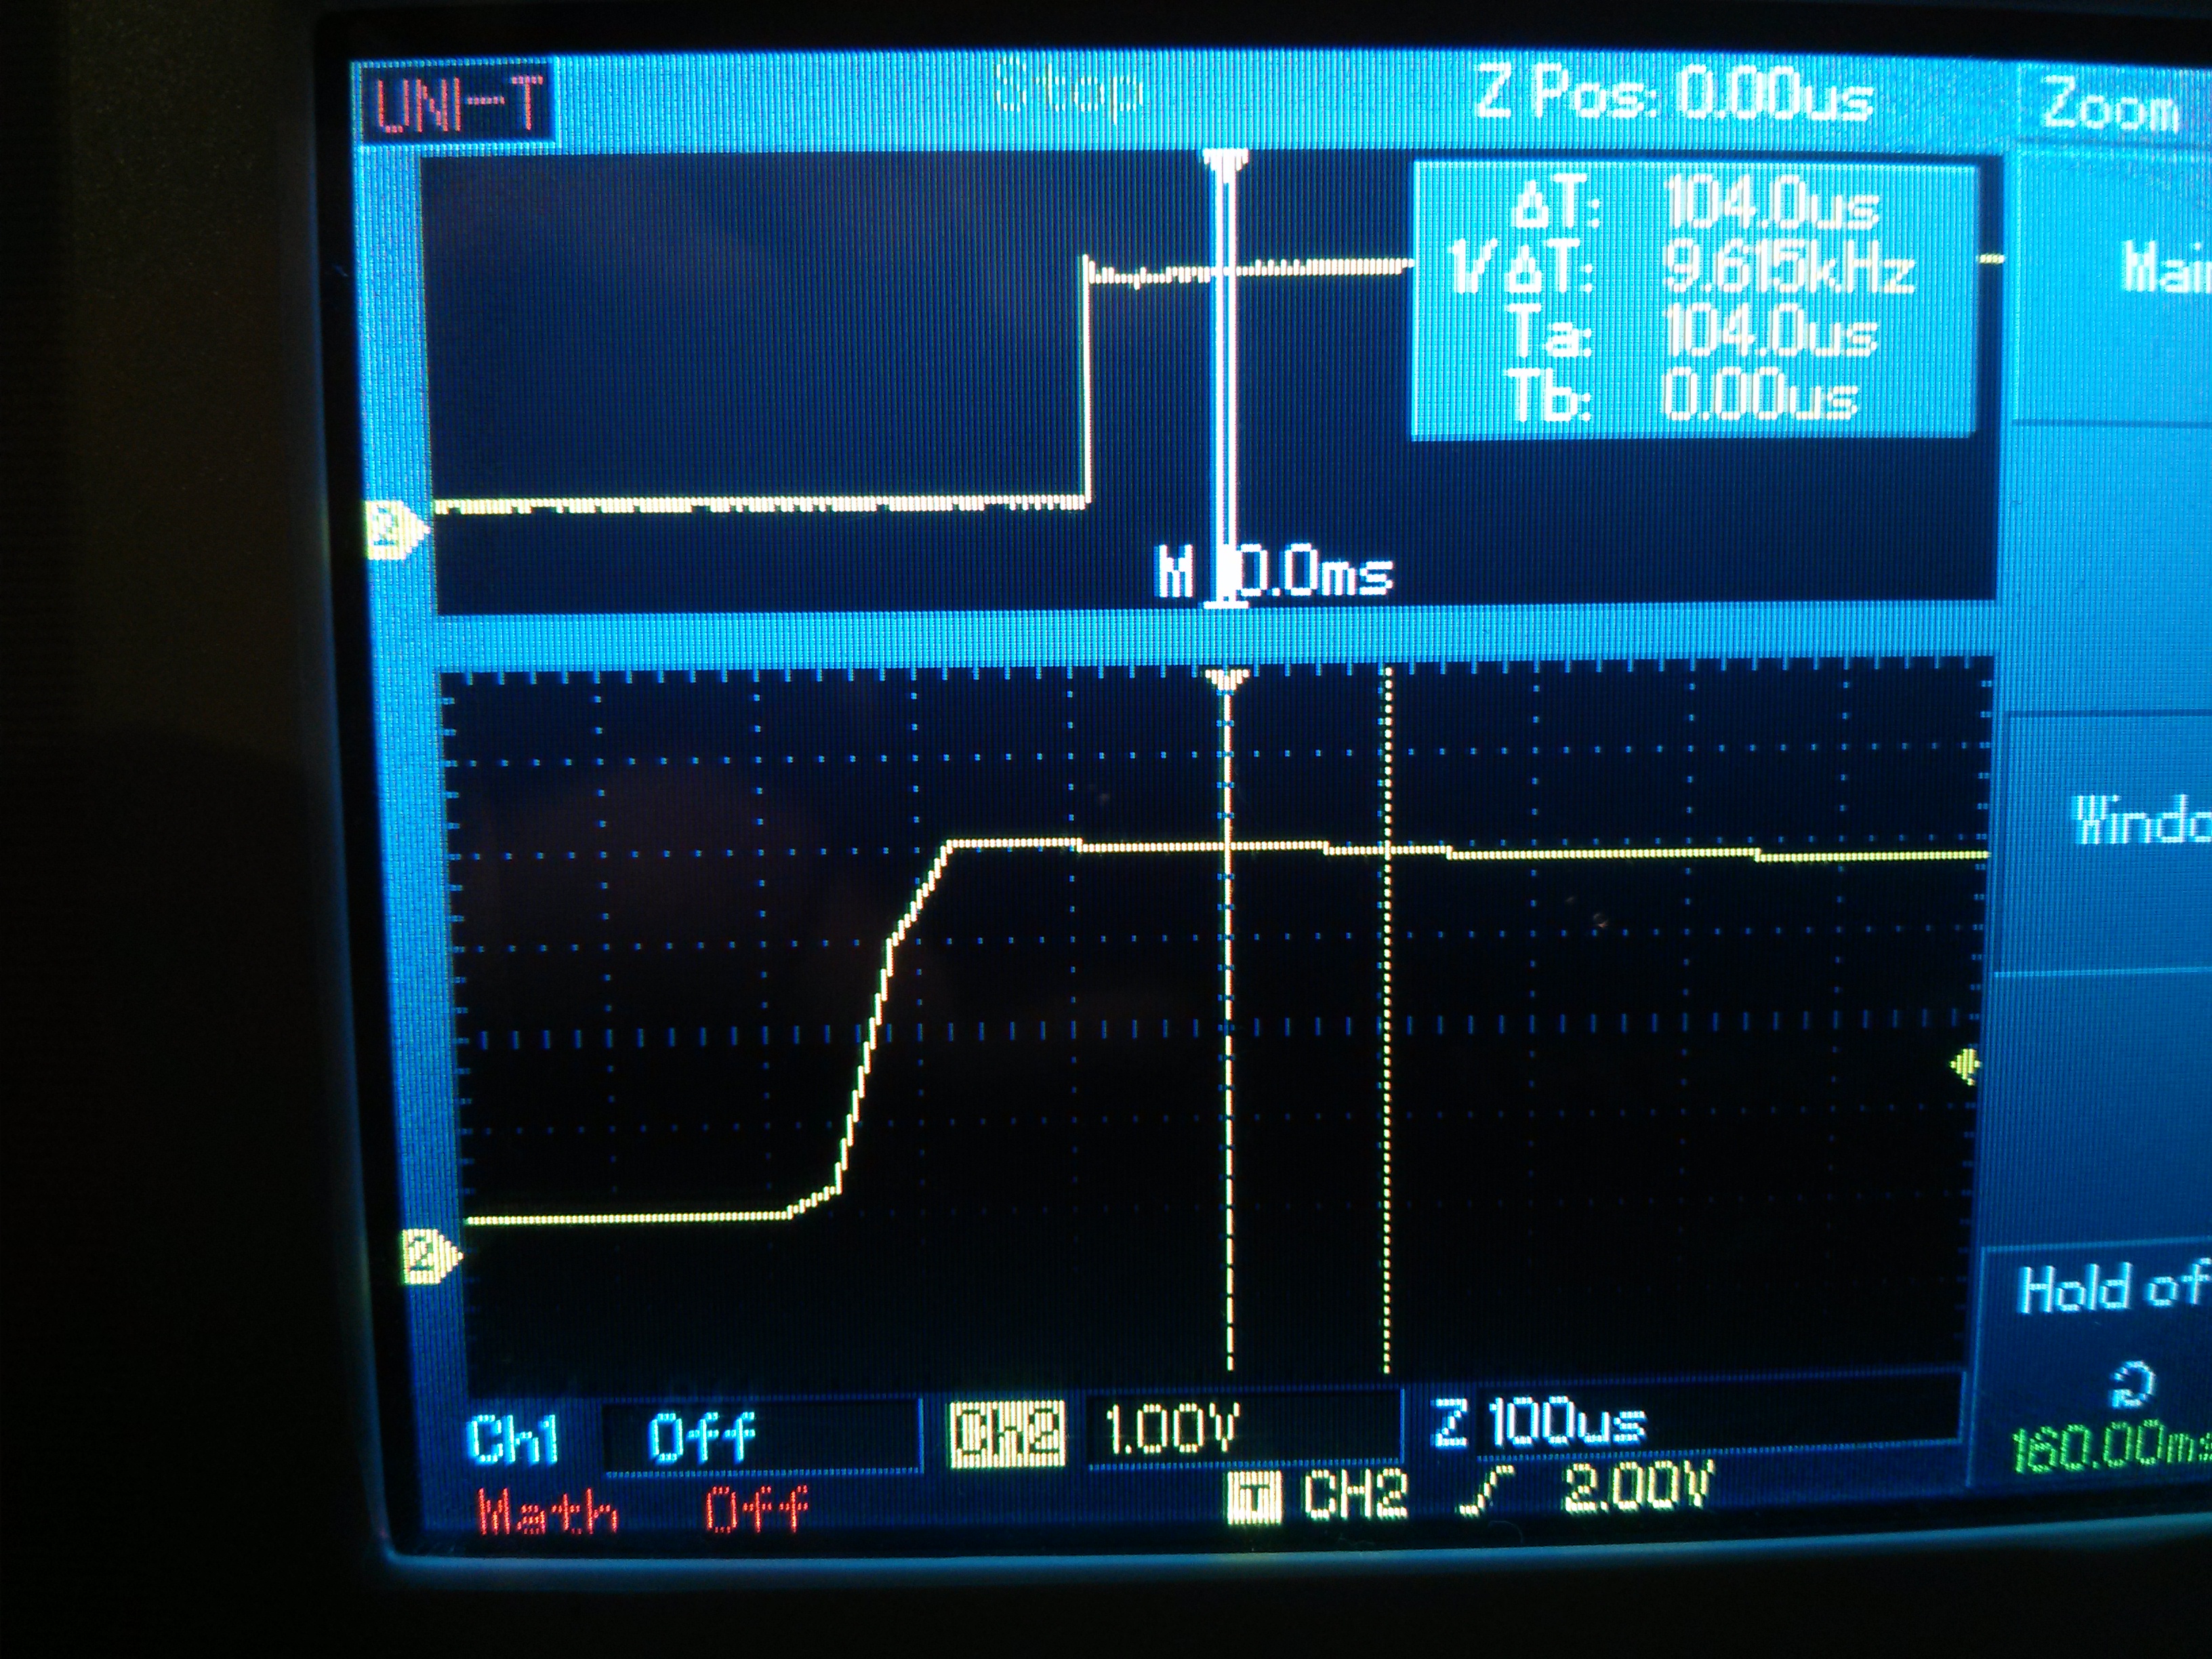
Before coming to the examples, let´s start with the reference, the voltage as recorded with the oszilloscope:

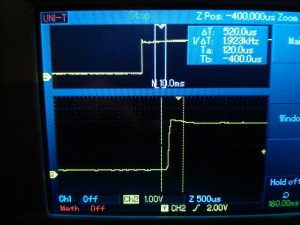
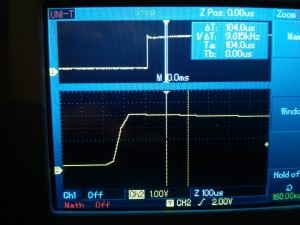
Here we see the voltage jump, which takes about 80µs according to the scope.
Measurements with the Arduino FastLogger
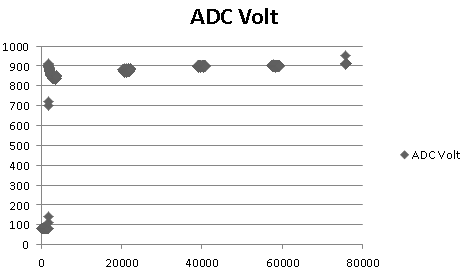
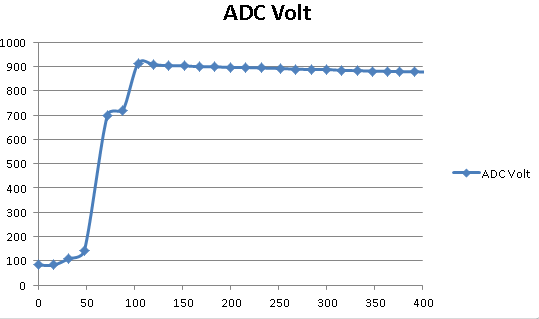
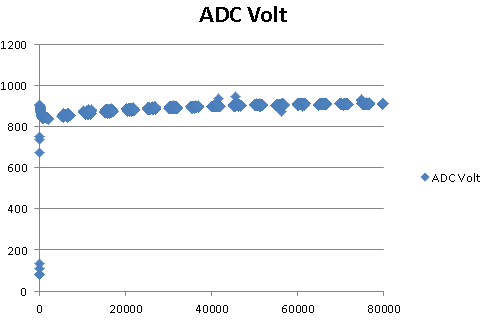
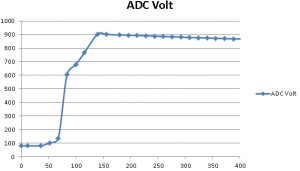
Example 1, Sample interval 25.00µs: ADC Volt is the ADC reading, ie 0-1024 (but as my calibration isn´t correct anyway…this is only for illustration)
Configuration: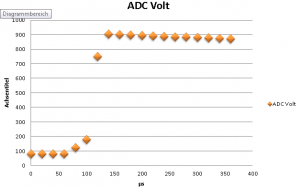
ADC clock MHz: 1.000
Sample interval usec: 25.00
Sample Rate: 40000.00
Record time ms: 2004
Sample count: 160268
Overruns: 0
Example 2, Sample interval 8µs:
Here you can see that the number of overruns dramatically increases and the number of samples is even lower than with the lower sample rate in example 1. We can also see large gaps over the whole duration of the measurement. In the detail of the first phase it shows only little more detail than the measurement in example 1.
Configuration: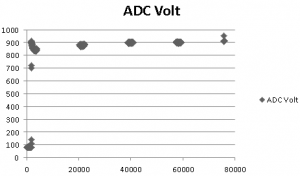
ADC clock MHz: 2.000
Sample interval usec: 8.00
Sample Rate: 125000.00
Record time ms: 2020
Sample count: 27210
Overruns: 164254
Example 3, sample interval 12.5µs:
Still a lot of overruns….
Configuration:
ADC clock MHz: 2.000
Sample interval usec: 12.50
Sample Rate: 80000.00
Record time ms: 2007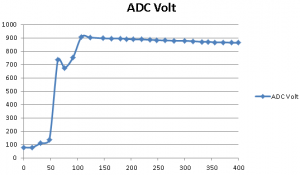
Sample count: 91996
Overruns: 87106
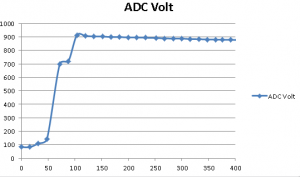
Example 4, sample interval 16µs
Configuration: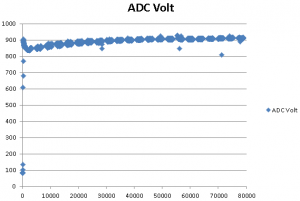
ADC clock MHz: 1.000
Sample interval usec: 16.00
Sample Rate: 62500.00
Record time ms: 2007
Sample count: 122444
Overruns: 47098
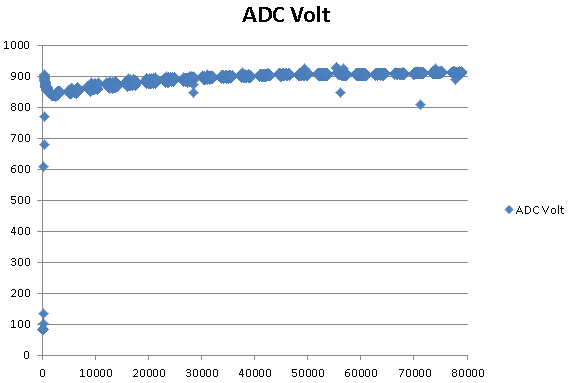
Example 4, sample interval 20µs
ADC clock MHz: 1.000
Sample interval usec: 20.00
Sample Rate: 50000.00
Record time ms: 2008
Sample count: 134646
Overruns: 33000
Conclusion
Depending on the SD card and hardware you are using, you need to experiment with the sample rate and need to decide, how many overruns you can accept. In my current test setup 40000 seems to be the best option; here I most often get 0 overruns. Ok, I could now fiddle somewhere betweein 40000 and 50000, but I doubt this will be worth the effort before I test with the real measurement of RPM, voltage and current….
| Sample Rate |
Overruns |
Sample count |
Sample interval usec |
ADC clock MHz |
| 40000.00 |
0 |
160268 |
25.00 |
1.000 |
| 50000.00 |
33000 |
134646 |
20.00 |
1.000 |
| 62500.00 |
47098 |
122444 |
16.00 |
1.000 |
| 80000.00 |
87106 |
91996 |
12.50 |
2.000 |
| 125000.00 |
164254 |
27210 |
8.00 |
2.000 |
Way forward
Let´s see, when I want to spend time on this again. Next todo is to combine this with my previous approach, where the interrupt is triggered from the RPM measurement impulses and only in the interrupt voltage and current are measured. I´m wondering how this will work together with the buffering in the fastLogger lib – and if 328p memory will suffice for all together 🙂